XRP Wallets: How to create and set up an XRP wallet
Learn how to set up, secure, and manage an XRP wallet. Explore wallet types, setup steps, and tips for safely storing and sending XRP.
By Corey Barchat
If you've explored the world of cryptocurrency, XRP has likely appeared on your radar as an option for quick and low-cost transactions. Launched by Ripple Labs back in 2012, the token is commonly used for cross-border payments by individuals and financial institutions alike.
But to securely manage, send, and receive XRP, you’ll need an XRP wallet. Like any crypto wallet, XRP wallets come in all shapes and sizes, catering to users with different needs and preferences when it comes to security, ease of access, and compatibility with devices.
So, which wallet is best for you, and how do you set one up?
In this guide, we cover the different types of XRP wallets, factors to consider when choosing one, and provide step-by-step instructions for setting up your wallet so you can confidently start your XRP journey.
Types of XRP wallets
Each type of XRP wallet offers unique features. Here’s an in-depth look at the most common types to help you make a more informed choice.
Hardware wallets
Hardware wallets are physical devices specifically designed for more secure cryptocurrency storage. These wallets are often small, USB-like devices that hold your XRP offline via "cold storage." Cold storage means that the wallet is not connected to the internet, which provides a higher level of protection from hackers, malware, and phishing attacks.
Pros:
- Highly secure due to offline storage
- Ideal for long-term holders who don’t need regular access
- Resistant to most online threats and hacks
Cons:
- Initial cost of the device
- Less convenient for frequent transactions
- Risk of losing or misplacing the hardware device
Popular hardware providers like Trezor and Ledger support XRP, as well as other cryptocurrencies such as Bitcoin and Ethereum. These devices require users to set up a PIN and backup a seed phrase during setup, for the purpose of wallet recovery (in case of device loss or damage).
Hot vs. cold wallets
Since hardware wallets are often called cold storage, then it will come as no surprise that there must also be hot storage. Here's the difference:
- Hot wallets: Always connected to the internet, making them suitable for users who frequently access their XRP for transactions. However, this connectivity also makes them more vulnerable to online attacks.
- Cold wallets: Offline wallets that provide enhanced security but require users to reconnect to the internet for transactions. These are ideal for larger XRP balances that you don’t need to monitor on a daily basis.
Like any crypto wallet decision, choosing online or offline wallets all boils down to how much you value convenience vs security.
Software wallets
Software wallets are digital applications that run on a computer, smartphone, or through a web browser. They offer the flexibility of managing XRP on the go, which makes them highly convenient, but they may not offer the same security level as hardware wallets.
Software wallets come in various formats to suit different user needs:
- Mobile wallets: Mobile wallet apps like Exodus, Trust Wallet, and Xaman are popular choices to store XRP, allowing users to manage XRP directly from their mobile devices, such as a cellphone. These are suited for users who want to use their wallet on-the-go.
- Desktop wallets: Desktop wallet providers like Atomic Wallet and Exodus provide a feature-rich interface on computers, ideal for users who may prefer to manage their XRP at home on a larger screen.
- Web wallets: Web-based wallets such as Trust Wallet, Guarda, and GateHub offer XRP storage accessible via a browser, which is ideal for users who need to access their funds across various devices (typically a laptop or computer).
- MoonPay XRP Account: You can easily manage XRP and Ripple USD (RLUSD) tokens by using your XRP account in the MoonPay app. View your XRP balance, swap XRP for other crypto assets, sell XRP for fiat currencies, and send XRP to an external wallet, all in one non-custodial wallet that you control.

Paper wallets
Paper wallets are a unique and highly secure method of storing XRP. By generating a paper wallet, you’re creating a physical copy of your public and private keys printed on paper. These keys allow you to access your XRP, even though your funds are technically stored on the blockchain.
Pros:
- Completely offline storage, highly secure against online threats
- No hardware costs or potential device malfunctions
Cons:
- Physical vulnerability to loss, damage, or theft
- Can be inconvenient for frequent transactions
When creating a paper wallet, it’s important to store the material in a secure location, like a safe or lockbox, to prevent accidental loss or damage.
Exchange wallets
Exchange wallets are wallets provided by centralized cryptocurrency exchanges, like Binance or Coinbase, that allow users to store XRP directly on the exchange platform. Many newcomers find exchange wallets convenient since they allow easy buying, selling, and storing of XRP in one place.
However, the private keys to exchange wallets belong to the exchange themselves, meaning that users are not truly in custody of their own crypto. They are also connected to the internet, leading to increased vulnerability to hacks and theft compared to offline storage options.
Pros:
- Convenient for frequent trading and quick access to digital assets
- No additional setup required for users already trading on the exchange
Cons:
- Lower security compared to private wallets
- Users don’t have control over their private keys—they belong to the exchange
Custodial vs. non-custodial wallets
A critical distinction in the world of XRP wallets is custodial vs non-custodial.
- Custodial wallets: A third-party provider, such as an exchange, holds and controls the private key. Users trust the provider for security, though this setup has potential risks if the provider is compromised.
- Non-custodial wallets: These wallets give users full control over their private keys, meaning they are solely responsible for their wallet’s security and recovery. Non-custodial wallets are recommended for users who prioritize control and security.
Why it matters
In cryptocurrency, having control over your private keys is often equated with true ownership.
The choice between custodial and non-custodial wallets is about balancing convenience with custody and security. If you prefer easy access and are comfortable trusting in a third-party provider, custodial wallets can be a good option. However, if you value full ownership and responsibility for your XRP, non-custodial wallets give you that independence.
How to choose the right XRP wallet
So, which is the best XRP wallet? Again, there's no one solution for all types of users. Selecting the right wallet to store XRP comes down to personal preferences:
Secure or convenient?
When deciding on an XRP wallet, consider how frequently you plan to use it and prioritize a balance between security and convenience.
For instance, a hardware wallet is typically a more secure option to store XRP, but might be less convenient for frequent XRP transactions. On the other hand, a mobile wallet makes it easier to manage tokens on-the-go, but may be better suited for smaller amounts of XRP due to its online exposure.
XRP wallet compatibility
Ensure the wallet you choose is compatible with your preferred device, whether it’s a mobile, desktop, or web-based application, to avoid compatibility issues. Additionally, many wallets now offer cross-platform compatibility, meaning you can download the same wallet across multiple devices. This can be particularly useful for users who prefer flexibility when it comes to managing assets in different settings.
Tips for selecting an XRP wallet
Still not sure how to choose? Here are some common aspects to consider when selecting a wallet that fits your unique needs:
- Prioritize security features: Look for a wallet that offers two-factor authentication (2FA), biometric login, and backup options to enhance the safety of your assets and help protect your XRP from unauthorized access.
- Choose exchange functionality: For frequent traders, select a wallet that allows easy crypto swapping or trading within the app, without the need to transfer funds between platforms.
- Evaluate customer support: Opt for wallets with reliable customer support, especially if you’re new to managing crypto assets and may need assistance.
- Check multi-device optionality: If you plan to use your wallet on different devices, look for one that offers cross-platform compatibility.
- Consider ease of use: For beginners, a wallet with a user-friendly interface can make managing XRP simpler and more intuitive.
- Look for personalized options: Some wallet providers have additional tools like transaction tracking, balance notifications, and customizable alerts to help you stay updated on your XRP holdings.
MoonPay XRP Account: All features in one place
MoonPay makes managing XRP a breeze. You can buy XRP, track your tokens, sell, and swap, all in one app. With a non-custodial platform, you're always in full control of your funds, whether you're new to crypto or a seasoned trader.
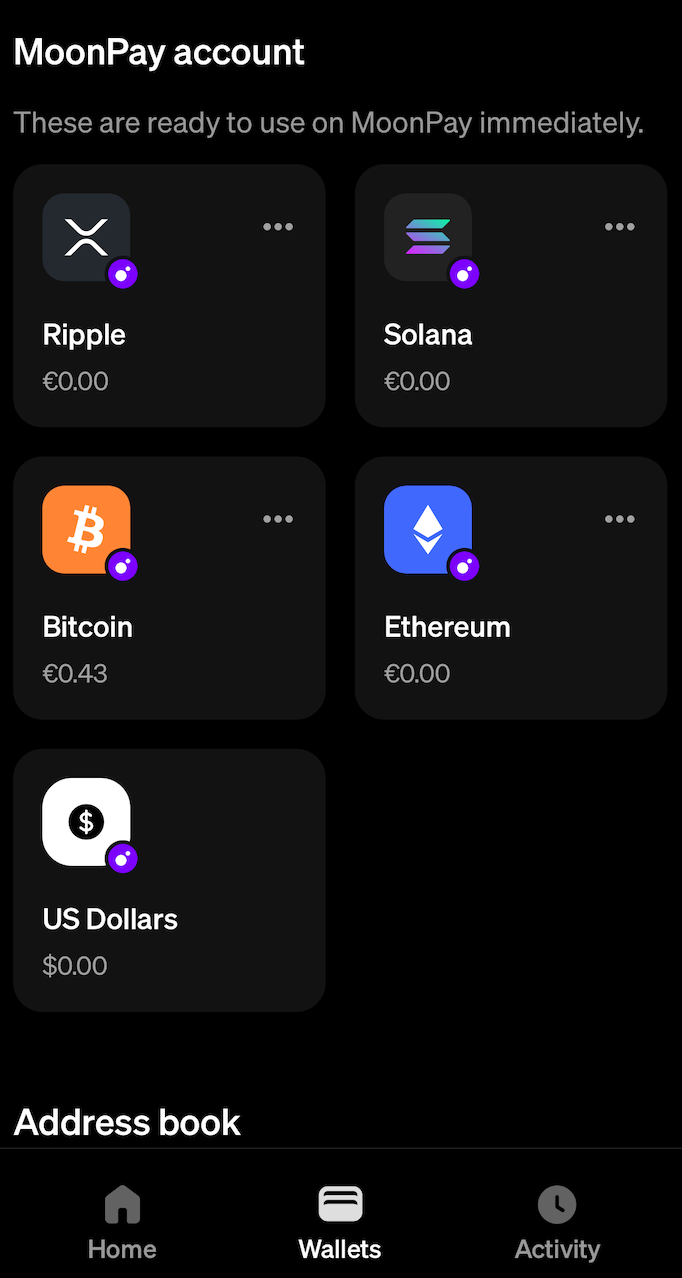
Plus, with 24/7 dedicated support and security certifications like ISO-27001 and 27018, you can trust that your funds and data are protected.
Step-by-step guide: Setting up an XRP wallet
Let’s go through the step-by-step process to set up various types of XRP wallets.
MoonPay: The easy way to store XRP
A quick way to set up an XRP wallet is through MoonPay.
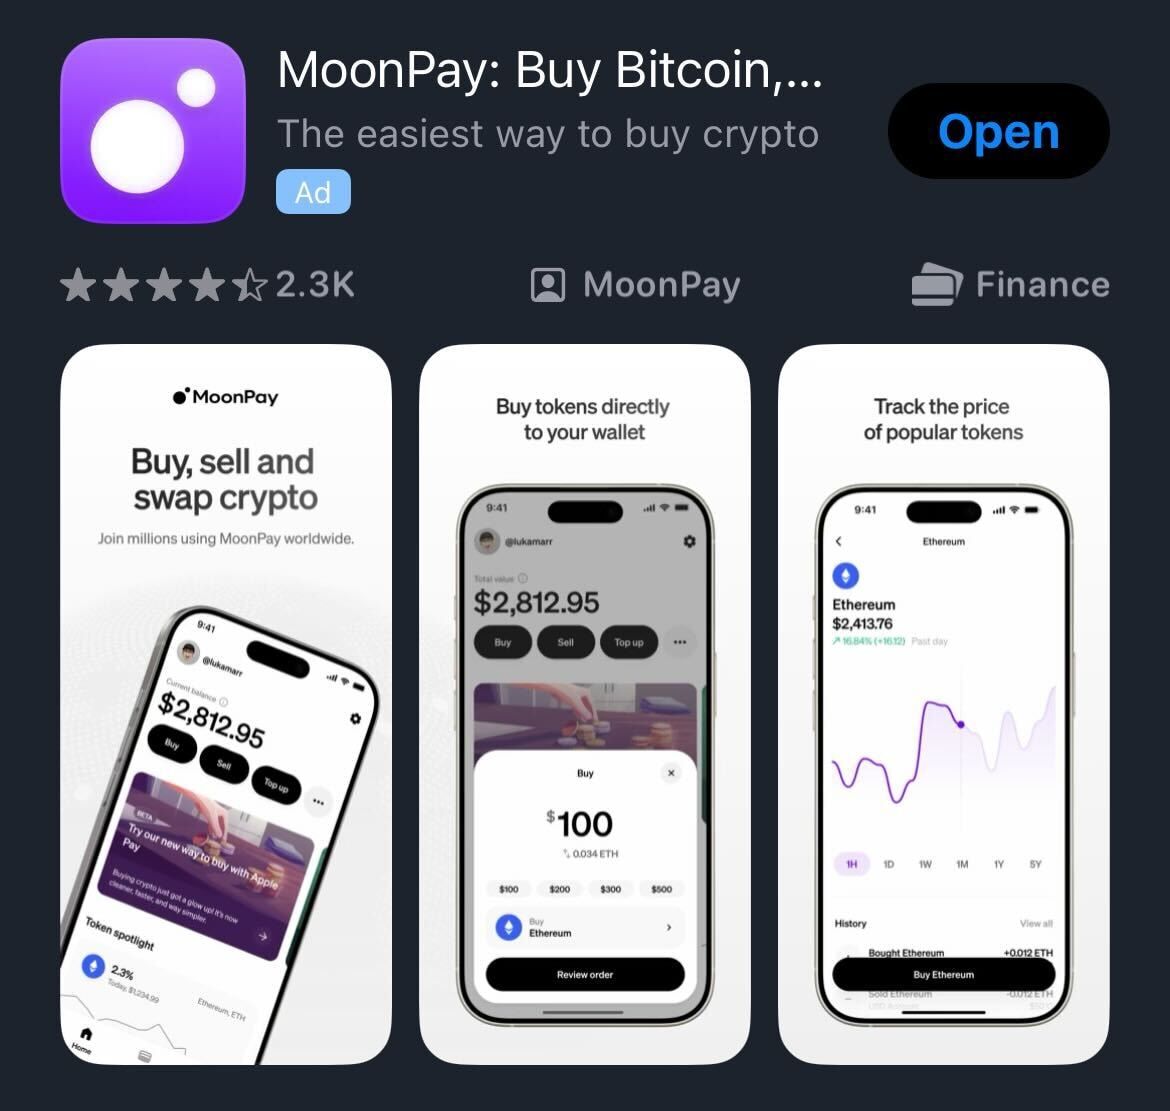
To begin, simply head to the app store on your preferred device and download the official MoonPay app:
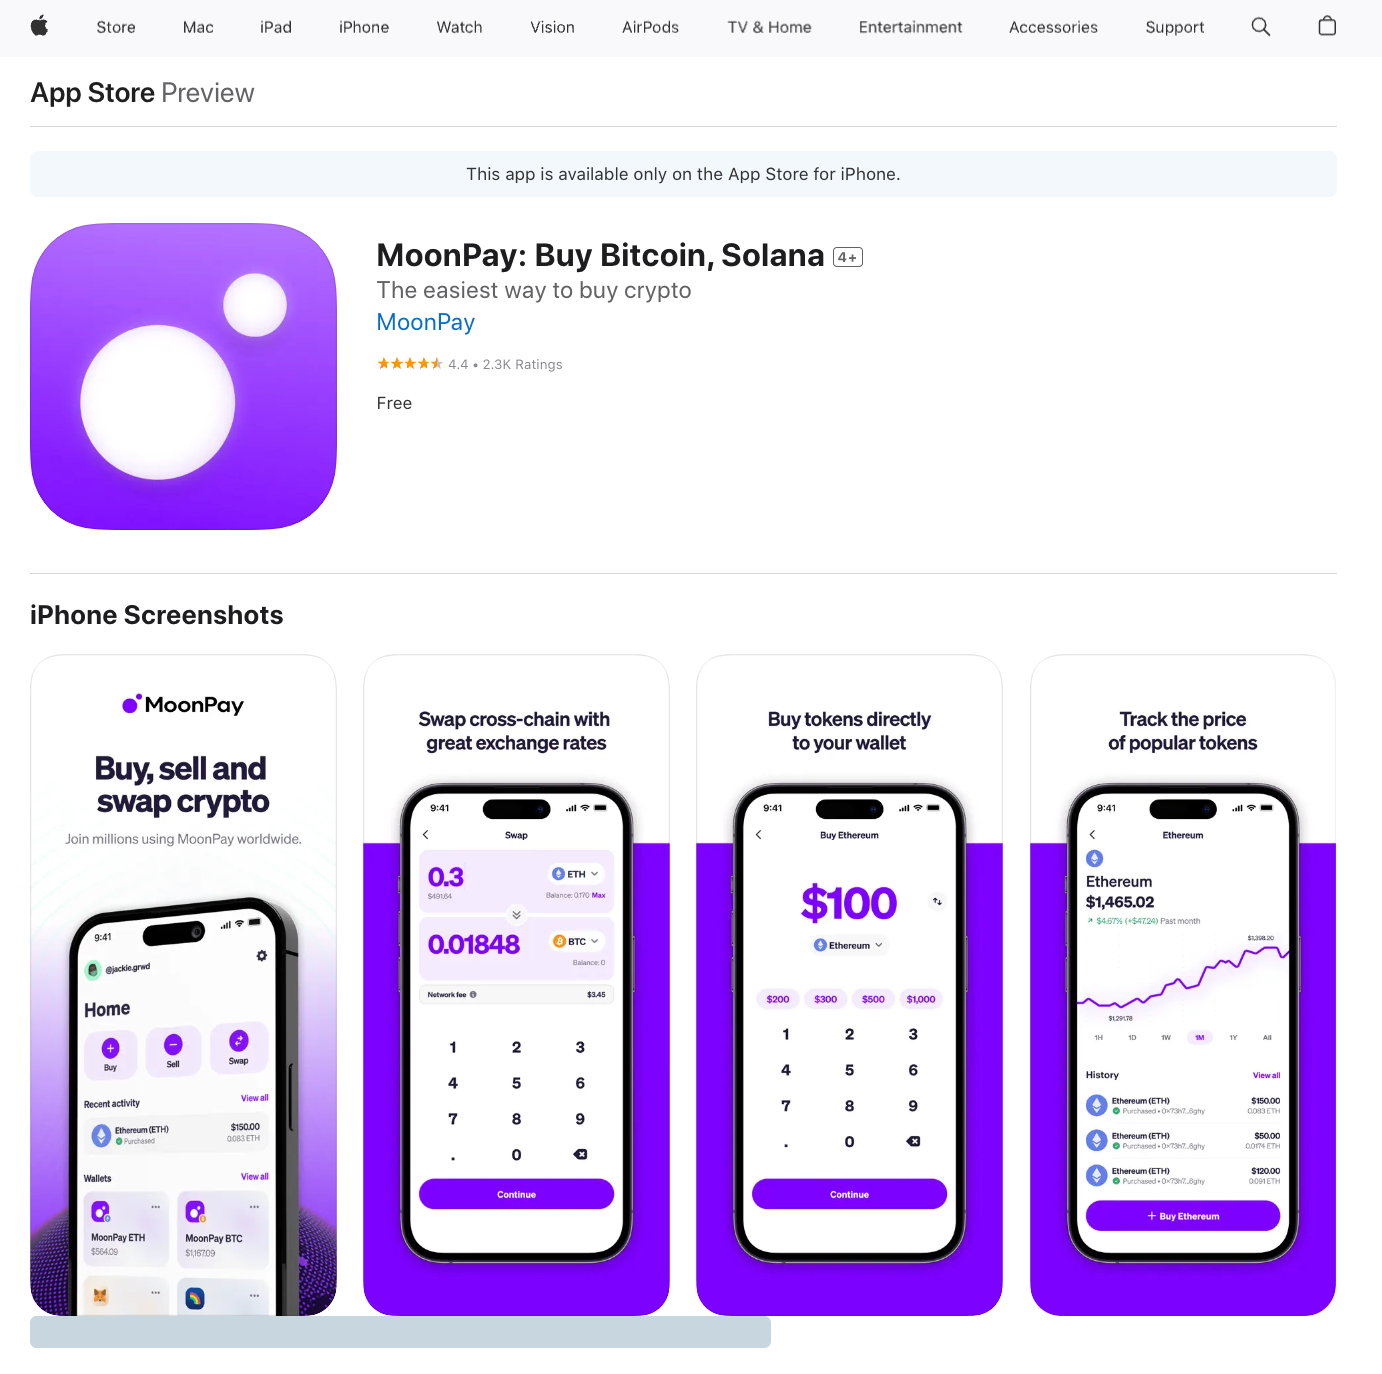
After downloading the app and verifying your account, an XRP wallet will already be set up for you! It's that simple—just one step and you're ready to start managing your assets.
Setting up a hardware wallet
- Connect the device: Plug in your device to your computer to connect your hardware wallet.
- Install wallet software: Follow the instructions to install the XRP wallet software and create a new wallet.
- Back up your seed phrase: Record your seed (recovery) phrase on paper—never online—and store it securely. This phrase is necessary for recovering your wallet if the device is lost or damaged.
- Verify configurations: Set up a PIN or passcode on your device for added security (if available), and verify that the wallet is properly configured by checking your XRP balance.
Tip: Try making a small test transaction using the new wallet address.
Setting up a software wallet
- Download the app: Choose a reputable application like MoonPay or Trust Wallet and download it to your chosen device.
- Create an account: When you activate your account, the wallet app should generate a seed phrase for backup.
- Store your seed phrase: Record your private key in a safe place offline.
- Enable additional security: Many software wallets offer optional safety features like two-factor authentication (2FA) or fingerprint/biometric authentication.
Setting up a paper wallet
- Generate a paper wallet for XRP: Use a reputable paper wallet generator, preferably one that can operate offline, to create your XRP keys.
- Store it securely: Print or write down your wallet address, and store it in a secure location to protect it from loss or damage.
- Test your wallet: Before storing significant amounts of XRP, test the wallet by sending a small amount to and from it to ensure the wallet is functioning correctly.
Creating an XRP Wallet on an exchange
- Register with an exchange: Sign up using a reputable exchange like Binance or Coinbase. Normally, the crypto exchange will automatically create a new wallet for XRP.
- Enable 2FA: Add extra protection to your wallet by enabling two-factor authentication, and always use a strong, unique password.
- Set withdrawal whitelists (optional) : Some exchanges allow you to whitelist wallet addresses, limiting withdrawals to trusted addresses only. This adds an extra layer of security by preventing unauthorized transfers.
How to use your XRP wallet
Now that your wallet is set up, here’s how to start using it.
Funding your XRP wallet
To begin using your XRP wallet, you’ll need to add funds by transferring XRP from another wallet or purchasing XRP through an on-ramp like MoonPay.
How to buy XRP via MoonPay
Step 1: Go to your XRP wallet
Just click on the XRP icon in the MoonPay app to view your default XRP wallet.
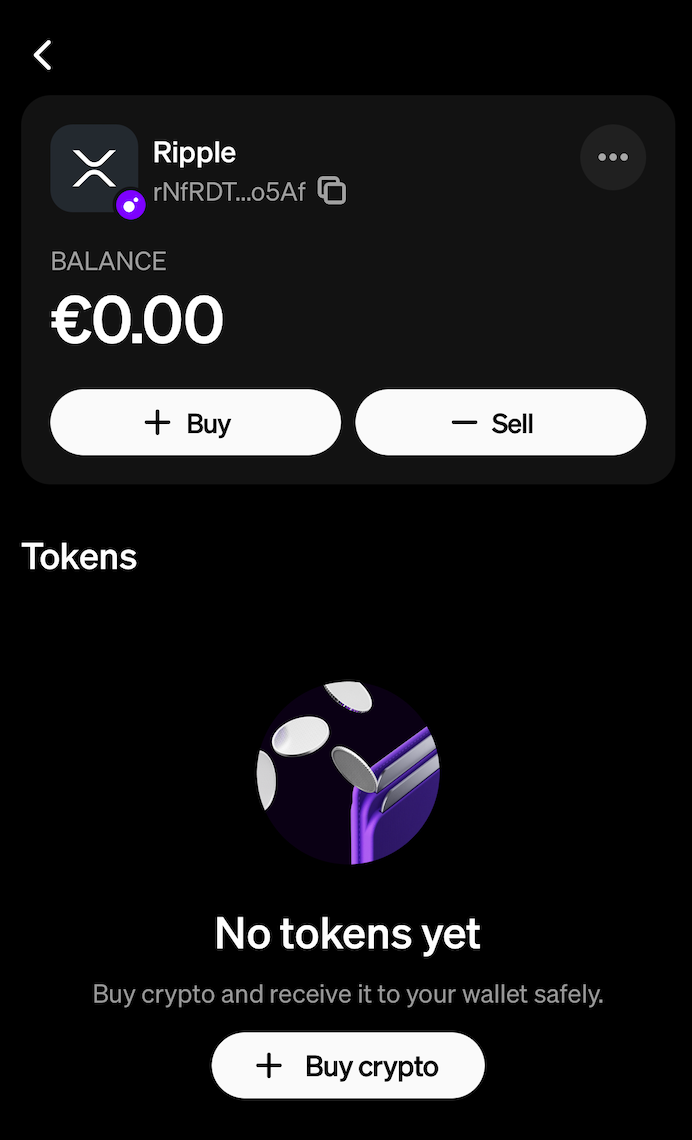
Step 2: Buy XRP tokens
In your XRP account, click Buy to purchase XRP tokens using payment methods like credit/debit cards, bank transfer, PayPal, Venmo, Apple Pay, and more.
Enter the amount you'd like to buy, denominated in your preferred fiat currency or in XRP.
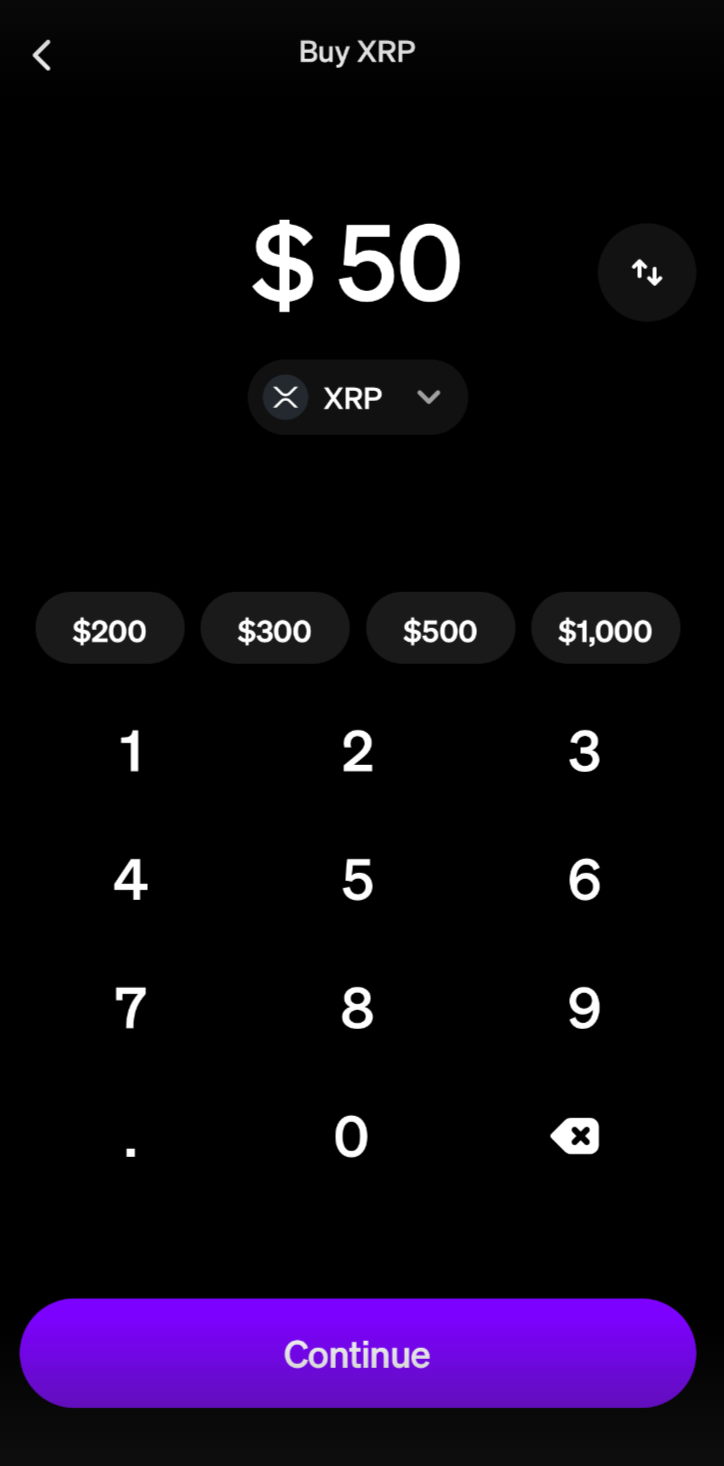
That's it! After a few minutes, you'll receive XRP tokens in your wallet.
For an even better XRP purchasing experience, you can top up your MoonPay balance using fiat currencies like USD and EUR. Enjoy cheaper transactions, higher approval rates, and zero-fee withdrawals when you cash out XRP to your bank account.
How to receive XRP from another wallet
- Open your wallet, select the “Receive” option, and copy the provided XRP address.
- Share this address with the sender or use it to transfer XRP from another wallet.
Make sure to double-check the wallet address before confirming any transaction to avoid sending funds to the wrong address, as crypto transactions are irreversible.
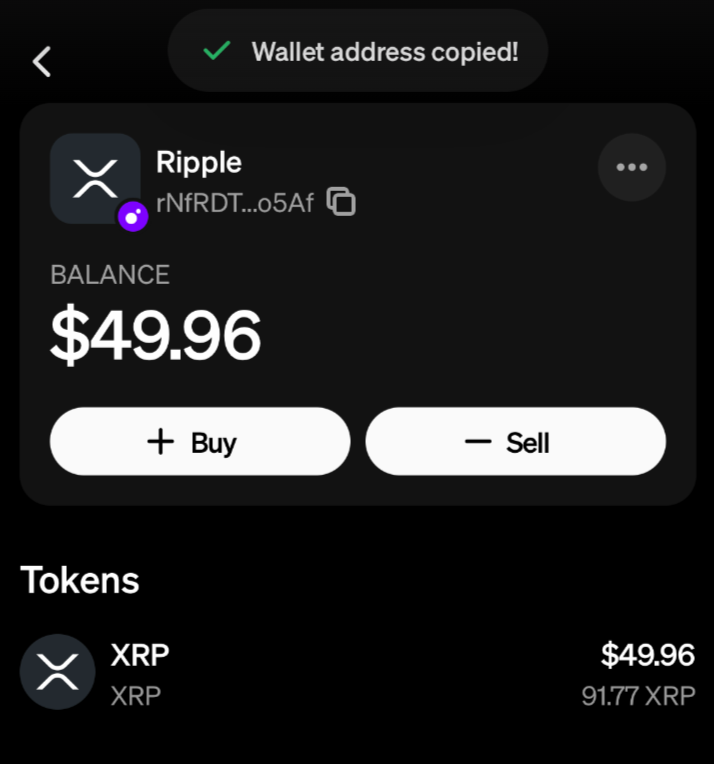
For added security, some wallets offer QR codes for easier and more accurate address sharing, which reduces the risk of errors during the transaction process.
How to send XRP to another wallet
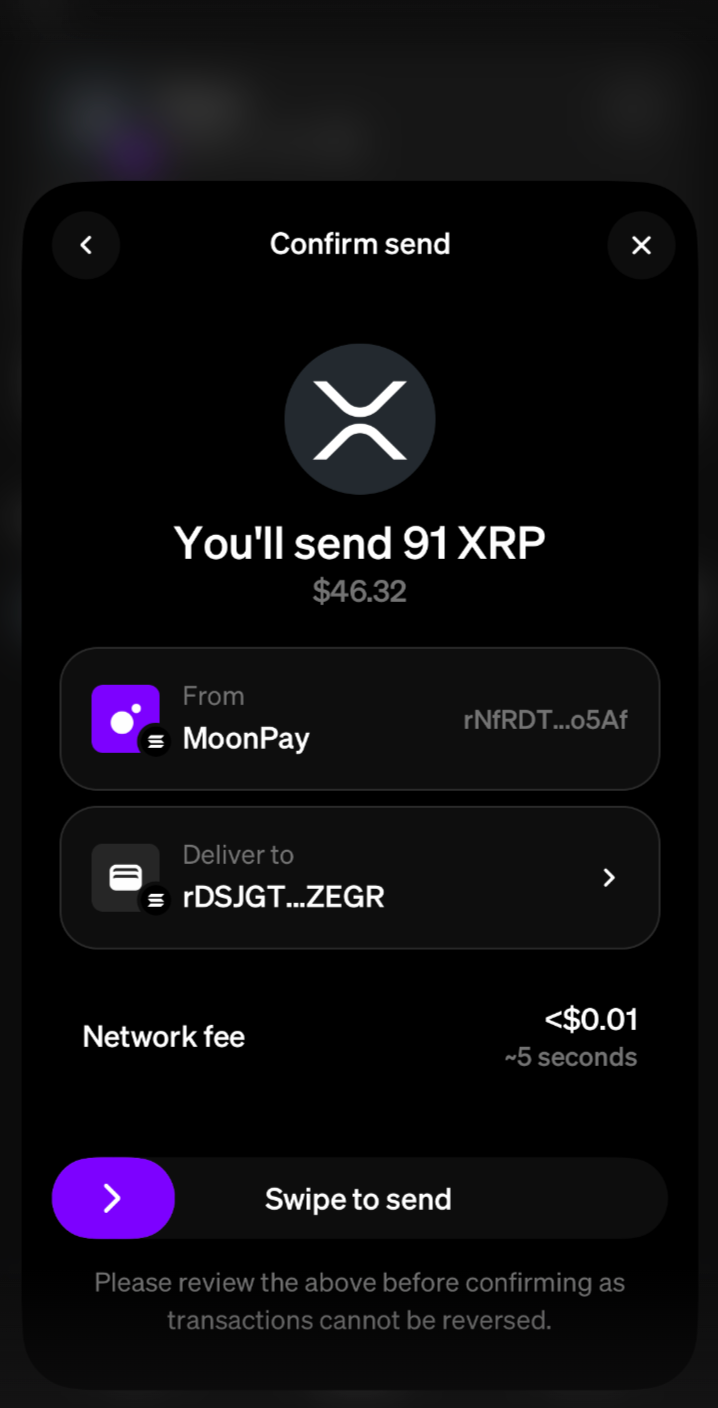
- Enter the recipient's address and amount: In your wallet, select the “Send” option, then input the recipient's XRP address along with the amount of XRP you’d like to transfer. Be sure to double-check the address for accuracy.
- Confirm and complete the transaction: Review the transaction details, confirm any fees, and then authorize the tranasaction complete the transfer. Once confirmed, the XRP should appear in the recipient’s wallet within a few seconds.
Monitoring your wallet balance and history
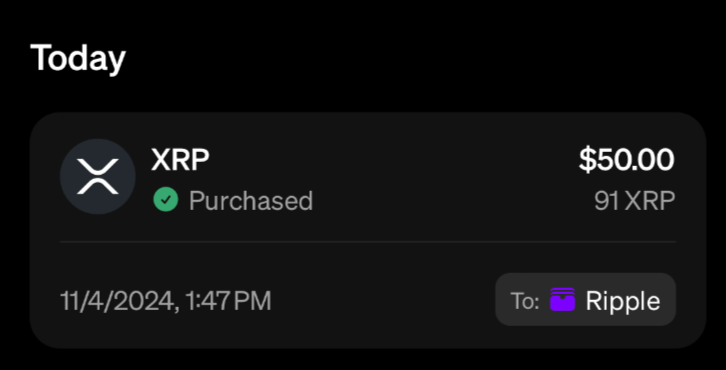
Use your wallet’s interface to view your XRP balance, track recent transactions, and monitor your funds over time. Many wallets also provide customizable alerts or notifications, allowing you to stay updated on any significant balance changes or transactions.
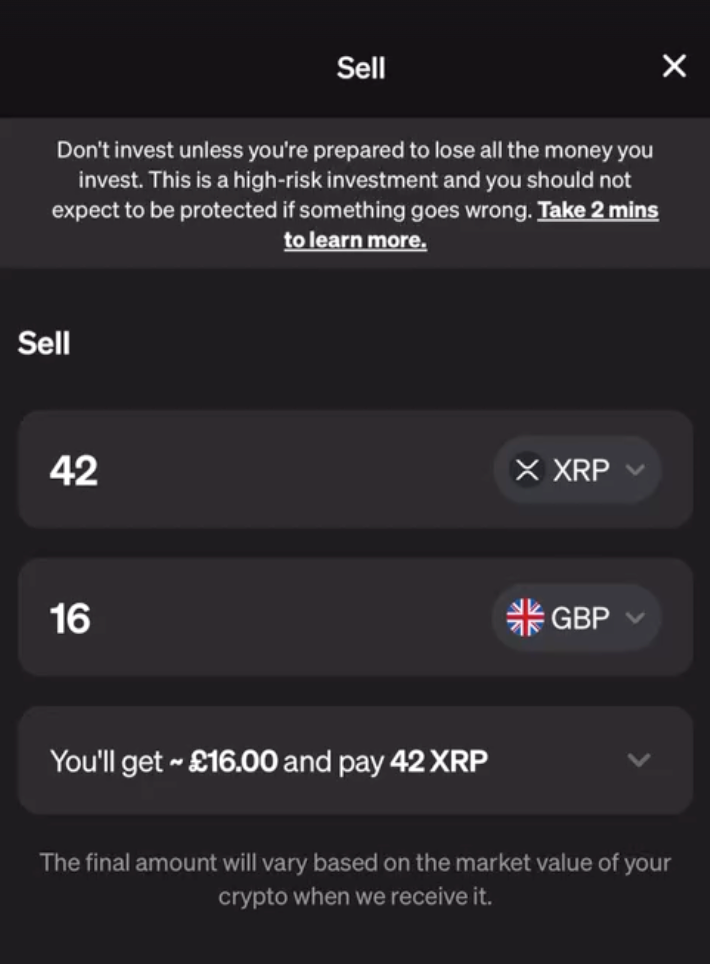
Converting and exchanging XRP in your wallet
Some wallets offer built-in exchange features that allow you to swap XRP for other cryptocurrencies, or sell to fiat. If you plan to trade frequently, consider wallets that integrate with exchanges for seamless swaps, or choose platforms like MoonPay with quick conversions and easy off-ramping features.
Tips & best practices for managing your XRP wallet
Regardless of user experience level, proper wallet management is essential for securing your XRP tokens and protecting your digital assets.
XRP wallet backup and recovery
Having backups is a good idea to protect your assets if you lose or damage your hardware wallet or mobile wallet device. Always keep a physical copy of your recovery phrase in a secure location, such as a safe or lockbox, and avoid storing it digitally to minimize the risk of unauthorized access. Regularly verifying that your backup information is accurate can also save you from potential data loss in case of an emergency.

Avoiding common security risks
Protecting your wallet from threats like phishing attacks, malware, and other crypto scams is key to keeping your assets safe. Be cautious about sharing any sensitive wallet information, and only download wallet apps from official sources to avoid malicious attacks via software. Additionally, using a VPN can add an extra layer of protection when accessing your wallet.
Updating wallet software regularly
Regular updates help protect your wallet against potential vulnerabilities by ensuring it has the latest security patches. If you use the wallet across multiple devices, you should keep each one updated to prevent potential security gaps and maintain compatibility. Remember that developers frequently improve wallet security and functionality, so staying up to date also enhances your wallet experience and protection level.
FAQs about XRP wallets
Do I need a minimum amount of XRP to activate my wallet?
Yes, the Ripple network requires a minimum balance of 1 XRP in an XRP wallet to keep it active. This base reserve helps maintain network integrity by preventing the creation of inactive or “spam” accounts, so that your wallet is recognized as active on the XRP ledger.
What should I do if my XRP wallet is compromised?
If your wallet is compromised, transfer your funds to a secure wallet immediately. You should also change any associated passwords, enable two-factor authentication if it wasn’t already, and contact the support team of your wallet provider for further assistance to prevent future risks.
For more security tips, view our article: Crypto security basics
Can I use the same XRP wallet on multiple devices?
Many wallet providers allow access across multiple devices, though there are some XRP wallets that are only accessible on certain types of platforms (such as desktop or mobile). Regardless, you should still ensure each device is secure and updated to avoid potential vulnerabilities.
Is it safe to store XRP on an exchange wallet?
Exchange wallets are convenient but generally less secure than non-custodial wallets. Exchanges and centralized custodians are frequent targets for hacks, and if they are compromised, then your funds could be at risk too.
For long-term storage, a non-custodial or hardware wallet is often a safer choice, as it keeps your XRP under your direct control and better protected from online attacks.
Start your XRP journey with MoonPay!
Ready to manage XRP like a pro? MoonPay offers a user-friendly way to onboard into the XRP ecosystem and start exploring all that it has to offer.
To begin, simply buy XRP in your preferred wallet or in the MoonPay app. Enter the amount in XRP or fiat that you wish to purchase, and follow the steps to complete your order.
When you decide it's time to cash out, you can easily sell XRP with MoonPay's handy off-ramp, and receive cash in your preferred fiat currency.

.png)


